Did you know? In another life, I was a photographer! 📸 (And by another life, I mean in high school!)
Yep. At the tender age of 16 I started my very first business. I started shooting senior portraits and continued through college – eventually growing that business to six-figures. (And my mom’s name is on my Paypal account to this day – because I was too young to have my own when I opened it… and now I can’t change it. 🤣 #TrueStory!)
As a photographer and a young entrepreneur, I had boatloads of fun and learned sooooooo much – about business, personal branding, photography, people… In fact, I probably learned more by running a business than I did in the classes I took to obtain my degree. (Shhhhh… Don’t tell my professors! 🤓)
So, it’s no surprise that I have a LOT to share about brand photography, right? After all, I’ve had extensive experience on both sides of the camera.
These days – as an entrepreneur who’s building an online brand – I have a constant need for on-brand images. So, that puts me on the front side of the camera – frequently. Truthfully, I wasn’t always comfortable being photographed, but I’ve grown quite accustomed to it. And now I really enjoy planning, preparing for (and actually being the subject of!) brand photography shoots.
So in this article, I’m going to share the lessons that I’ve learned – on both sides of the camera. If you’re planning a personal brand photo shoot, you’ll want to stick around for all the goodness! (And maybe bookmark this page or pin to Pinterest for reference! ← That would be smart! 🤓)
(🎥 Speaking of the front side of the camera, if you’d prefer to get the 411 from a video, you can click below to watch. The article that follows is a little more detailed, though… so read on too, Genius!)
Ready? Let’s look at the 5 steps you can take to get the very best images from your brand photography shoot.
Step 1: Curate a brand photo shoot inspiration board.
I’ve done nearly a dozen brand photo shoots now – for my brand. And I always start my planning by creating an inspiration board.
I’m partial to Pinterest, so I generally head there to do my curation. Here’s how you can do this, too:
Start a new Pinterest board (you can keep it secret 🤫 for now if you’d like!) Begin by adding personal brand portraits that other people (like me!) have pinned. Look for some shots that “feel like” your brand and fit the aesthetic that you want.
To find some general ones at first, search for things like “head shots,” “personal brand photos,” “brand photos of men,” etc. You can also get more specific and search for things like “brand photos for floral designers,” “yoga teacher head shots,” or “Realtor brand photos.”
To get some initial momentum on this project, you can start by re-pinning some shots from my Pinterest Board called “Personal Brand Photography.” It houses more than 1300 shots (and counting! I’m slightly obsessed!) so you’ll be sure to find some that feel like Y-O-U!
See some you like? Have at it! 📌📌📌

While you’re creating this inspiration board, also think about pinning:
- Photos in which the outfit someone is wearing looks like it might match your brand.
- Shots that are taken at a location or setting that might work for you. (An office? Your kitchen? A park? An alley with a cool perspective?)
- Poses or facial expressions that feel on-brand or somehow resonate for you.
- Objects or props that give context to who you are as an entrepreneur. (Your laptop? A cool hat? A copy of Forbes? More on this in Step 3… 💻 🎩 📘 )
A few more tips…
✔️ Don’t hesitate to expand to editorial or lifestyle images of people, too… In other words, be open to pinning photos that aren’t your “traditional” portraits or headshots. (Think: ads, candid shots, stylized photos, magazine covers…)
✔️ Remember, you can also add pins directly from websites. So, if there’s a particular entrepreneur whose photos resonate for you, you can head to her website and pin the ones you like. Or, if there’s a big brand that inspires you, think about pinning from their website – or even their Instagram profile.
✔️ If you’re leveraging brand archetypes, keep them in mind as you evaluate potential inspirational images to add to your board. My clients and students love to use their archetypes as a filter of sorts… to help discern what is “on brand” is for them (and what’s not).
My Pinterest account also features 12 archetype-specific boards – one for each ‘type (screenshot of the 12 boards below!). These can also be a source of inspiration – and pins – for your photo shoot board!
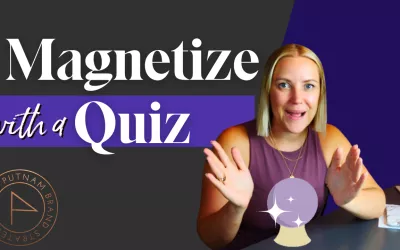
(Psssst… If you haven’t taken my Brand Personality Quiz to determine YOUR archetype(s) yet, you can do so here. More than 100,000 entrepreneurs have used this quiz to help define their unique brand personalities!… And, trust me, you want your brand photos to have some personality!)

Step 2: Find the best photographer for your needs.
There is a huuuuuge variation in terms of what photographers charge – and what their packages include. So, be sure to think through what you need – and what you have budgeted. (I’m about to help you do just that, actually! 😉)
Then, hire the person who is the best match for you – and invest as much as you can afford. Here are my top three tips for finding your best match.
- When it comes to locating potentials, my favorite pro tip is to look for wedding photographers. (Shout out to fellow brand strategist and friend Phil Pallen who taught me this one way back when…I’ve used this strategy for almost all of my sessions over the years!) …Now, this suggestion may seem kind of weird, because there are people who specialize in brand photography. But sometimes – especially if you live in a less densely populated area – it can be somewhat limiting to only consider those who identify as brand photographers.
Some wedding photogs will be willing to pivot slightly and book a session with you. I find that they often tick all my boxes:
✔️ They are really good at thinking on their feet.
✔️ They are accustomed to working with natural light situations.
✔️ They tend not to over-manipulate or over-process the photos.
… which brings me to the next step in evaluating someone.
- It’s really critical to make sure that you like a photographer’s style – before you hire her. Styles vary widely.
While many photographers are versatile, some definitely lean toward a certain aesthetic (e.g. bright and airy; dark and moody; saturated and energetic… and everything in between!) And, a LOT of the styling happens in editing… Some like a natural look, while some heavily edit their photos.
You should most definitely ask to see work samples. Most of the time, pro photographers make these readily available on their websites. But if you’re open to working with someone less established and she doesn’t yet have a website, you still want to see some sample work. When reviewing it, listen to your intuition. Do you like her work? Does it feel like your brand? Does it show the kind of style / sensibility that you’re aiming for?
- Find a photographer whose prices fit your budget. If style among photographers varies significantly, then pricing probably varies even more! So do your homework and ask questions.
I’ve seen photographers price a session as low as $100. And, I’ve seen packages that are a much bigger investment – several thousands of dollars or even $10,000 for highly-specialized, trained, and sought-after pros.
If you have a minimal budget, hiring a pro who’s just getting started (for perhaps $100-$250) can be a win-win. You get very affordable photos, and they get some experience and some portfolio pieces. BUT, remember that there is risk associated with this. Because they’re new, and you may not have the opportunity to really get to know their style first, you may end up with photos that aren’t what you need or want – or worse, that aren’t usable.
On the other end of the spectrum, you may be at a place in business to be able to invest $3,000+ for one shoot to get top-rate talent. Or, maybe not yet.
So, the logical answer is to shop a bit, and find someone who’s in your sweet spot – someone whose rates are affordable for you but who is something of a “known quantity.” In other words, as I said above… Hire the best photographer you can afford!
- Be certain that you know what deliverables are included – and how you can use the photos. Ask questions and carefully review the contract (if applicable) to understand:
- how much time will be spent at the shoot;
- how many locations can be used;
- whether wardrobe changes are accommodated.
(Pssst… You probably want the answer to that last one to be yes! You want variety, especially if you plan to use the photos for social media.)
Also, make sure you’re clear on what you will get, and in what formats. It’s not super-common anymore, but there are still some photographers who only sell you prints – not digital files. (Clearly, that doesn’t work well when you need photos for social media and your website!)
Some pros will deliver a limited number of edited shots. Others will send you all of the photos – both edited and “raw.” I personally always look for a photographer that’s willing to provide a large selection of digital files – not just one or two of them. I know that I need variety, and that I need LOTS of shots for my marketing strategy… so that’s important to me.
Lastly, make sure that you will be able to use the photos in the places that you expect to need them… your website, social media, business cards… whatever your needs are, be sure you understand what’s permitted – and if there are any restrictions on where and how you can use your images.
Many photographers only allow “personal use” of images to avoid you reselling their work onto stock image sites / to big corporations. Often I’ve needed to clarify that I need to use the images for commercial purposes – for my website and social media marketing – and they’ve been happy to adjust their typical contract verbiage to allow for that.
(But of course, I’m not a lawyer, so this isn’t official legal advice.)
Okay… so at this point you’ve gathered your inspiration on Pinterest, and you’ve secured a photographer. You’re on her schedule and paid the deposit. (Oh so exciting! 💃)
Now you just show up.. right?…
No! You still have much work to do, Grasshopper. But it’s FUN work! 😉
Now it’s time to…
Pin this article to reference later! 📌

Pin this article to reference later! 📌
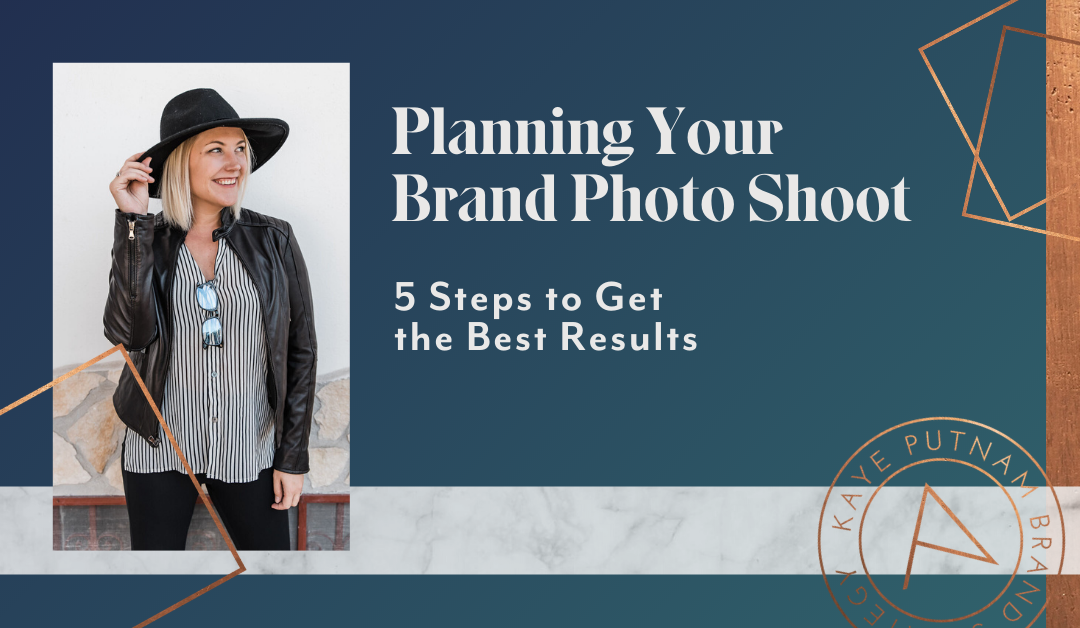
Step 3: Plan your brand photo shoot.
Now it’s (finally!) time to actually bring this shoot to life by…
- Researching and choosing a location (or locations). This might be simple – or it might take some time and research to secure what you want. Will you shoot in your own home office – or other at-home location like your living room or kitchen? Or maybe you have a friend or family member whose home offers better light or a better backdrop?
Or maybe there’s an office space or a public building that would really fit your brand style. Consider cafes, your library, a gym, a test kitchen… even schools (just be sure you’re welcome to shoot there!).
I recently discovered an airbnb-style booking site for photo locations called Peerspace that has a lot of cool spaces for rent. You can also consider actual airbnb and VRBO for interesting locations in your city.
I’ve also seen some fantastic outdoor settings as backdrops for brand photos. Maybe it fits your brand to be out in the wilderness… on a city street… in front of a piece of public art… or walking down an interesting alley. Be imaginative!
(Of course you’ll be able to draw inspiration from the board you curated in Step 1 … Seeeee? That’s why I started planning on Pinterest! 😚 )
- Start gathering the clothing, accessories, and items you want to use for the shoot.
What will you wear? Again, you can gather inspiration from your Pinterest board and then shop – or you can shop your closet! I personally prefer the latter, because when I pick something that’s already in my wardrobe, I know I’ll feel comfortable in it. (Current favorite? A *magical* ✨ feeling cape-blazer from ZARA!). Also, plan and pack a second and/or third outfit if you plan wardrobe changes.
Next, gather up the props you may want to appear in your shots. (Shop the stores, or your home!) I usually find that I use some – but not all – the items I gather. But why not have a variety on hand? These can be practical items, or object d’art. My standard props include my laptop, coffee mugs, books… But the only limit here is your imagination. What objects are meaningful to you? What objects do you use in your work? Which items might symbolize or evoke your brand archetypes? I’ve used a squishy play brain in past photos to evoke my Sage Archetype. The possibilities are endless!
- Book your hair and makeup appointments – if you want to. This is totally optional, but for some people – and for some brands – hiring pros to primp for your shoot is a must!
Side note… I have never had good luck with makeup artists for photos. I end up… not looking like myself. Eek. That’s NOT what you want in brand photos! And I tell you this because there is a branding lesson here…
You want to look your best, yes. But you still want to look like you. So if you’re not someone who wears a lot of makeup, don’t spackle it on for the shoot. And if you’re not someone who does “big hair”… well, you get the picture. 😉 📸 Basically, you don’t want someone to show up to your Facebook Live on a random Tuesday and literally not be able to recognize you! 🤣 We want to create a relatively consistent brand image.
Step 4: Define and communicate your deliverables.
Some of this conversation may have started in Step 2. But now that you’ve made your deposit, your photographer will likely dedicate a bit more time to getting clear on *exactly* what you need. This will be different than if you were planning to shoot for a family portrait or a wedding album – in terms of dimensions, image style, and other factors.
So, identify and communicate your specific needs. Don’t assume that he or she knows them.
Consider your immediate plans for the photos. For example, maybe you need some photos for your website hero images and banners? Then let her know that you need more horizontal (landscape) images. (Many portrait photographers tend to shoot a lot of vertical images… which are lovely, but won’t work for a web page header. #frustrating!)
Or maybe you’re a Realtor and you need some detailed, forward-facing smiling shots with a contrasting background – like yesterday! 🤣 – for your business cards and Zillow profile. So, tell your photographer – so she’ll be sure to prioritize those.
And then consider your general needs. Again, an online entrepreneur may need more photos for social media graphics. (Pro tip: Ask her to take some with a light background and negative space – so you can add text overlays to your social graphics!) … Meanwhile, a professional event speaker may need photos that fit the vibe and format of an event program.
So make a list or two and communicate your needs to your pro. Then, bring the list with you to the shoot so you can review it again just prior. It’s soooooo easy to get caught up in the moment and forget what you had on that list! Trust me… Been there, done that, got the t-shirt! 🤣)
Step 5: Show up at your best for your photo shoot!
Alright, aaaaalllllll of the prep work is done. (Who knew? This seemed so simple. 😜)
The last (oh-so-crucial!) step of this process is to prime yourself to show up at your very best on the day of the actual shoot. Here are a few things I recommend you be VERY intentional about – in the 24 hours leading up to this big day:
- Be careful what you eat. Everyone is different, and you know yourself best. But, well… I’m just going to keep it real 💯and throw this out there:
I am very personally sensitive to certain foods. There I said it. 😬
I really don’t want to show up to my shoot looking (and feeling) bloated or dehydrated. I know you don’t either. So, I plan exactly what I’ll eat for about 24 hours before… and I eat something super-light right before the shoot. You can also bring a light snack – a handful of nuts or some fruit is good for me. (You also may want to bring a toothbrush… just sayin’ since we’re over-sharing anyway. 😉)
- Try to get lots of sleep the night before. This is usually the best way to be – and look – rested and energetic. (If that doesn’t work out, your photographer may be able to help reduce bags or circles in editing, but it’s always better to start with a bright-eyed subject!)
Pro Tip: I tend to book my photo shoots around lunchtime or so. That way I’m not rushed in the morning. I can have a full morning routine and get centered. I can eat a nutritious breakfast, and I’m not starving or hangry before the shoot. Consider your energy patterns, and be intentional about picking a time of day that will work best for you!
- Give yourself grace. It’s easy to feel a lot of pressure (especially if this is your first foray into brand photos!). But remember that all WON’T be perfect, and that’s okay!
You might wake up with a pimple (your photographer might be able to help with that in editing, too – just ask! 😉). You might have to pivot if there’s someone sitting in your favorite cafe corner table. The wind might muss up your hair… BUT —> If you’re having fun, it will show in your shots, so keep your sense of humor about you and enjoy the moment!
Of course, the best way to relax and enjoy your brand photo shoot?… It’s to be prepared and get most of the details squared away in advance. I hope this article helps you be uber-intentional about that process – and helps you get the best possible results for your brand!
Here’s a quick rundown / reminder of some of my resources that might help you in your inspiration and planning:
Click here for my “Personal Brand Photography” Pinterest board – chock-full of examples and ideas.
Click these links for my brand archetype-specific boards:
The Caregiver
The Creator
The Entertainer
The Explorer
The Girl/Guy Next Door
The Hero
The Innocent
The Lover
The Magician
The Maverick
The Royal
The Sage
Click here to take the brand archetype quiz! (It’s fast and fun, and will help you to define your unique brand personality.)